Setup POP3 and SMTP for Outlook
-
- Step 1 – Go to File.
- Step 2 – Click Account Settings > Server Settings.
- Step 3 – Check the incoming mail settings.
- Step 4 – Check the outgoing mail settings.
- Step 5 – Done!.
In this guide, we show you how you can set up your email account in Outlook with POP3.
with New Perspective Design, our hosting services come with free domain name emails. These domain name emails are based on a webmail server alongside your web hosting. You can log into your webmail server to view and send email as your domain name email. Webmail however does not have push forwarding meaning you won’t be notified when you get mails.
There is however a very convenient and effective manner in getting around this. This is to use your current Gmail, Yahoo, or Outlook mail client to send and receive as domain name email right from the email client itself. No webmail login, no extra accounts and it will sync wherever you have a mail client set up such as your phone, iPad, and computer.
So at first, we are going to run through a quick and easy guide to getting your Gmail fetching mails via pop3 and sending domain name email from the comfort of your own Outlook account.
Before you continue, we want to make you aware of the following limitations.
- Outlook only allows you to set up your email with POP and not IMAP. This means that your email only gets downloaded, it doesn’t get synced back to the server.
- Outlook only downloads emails from your Inbox. Emails in other folders, like Send and Drafts are not downloaded.
- By default, Outlookl downloads the emails and then removes them from the server. We recommend that you check the option to leave a copy of the email on the server. That way you can still access your emails in Webmail.
Step 1 – Go to File
Open Outlook 2016 and click File in the top left corner.
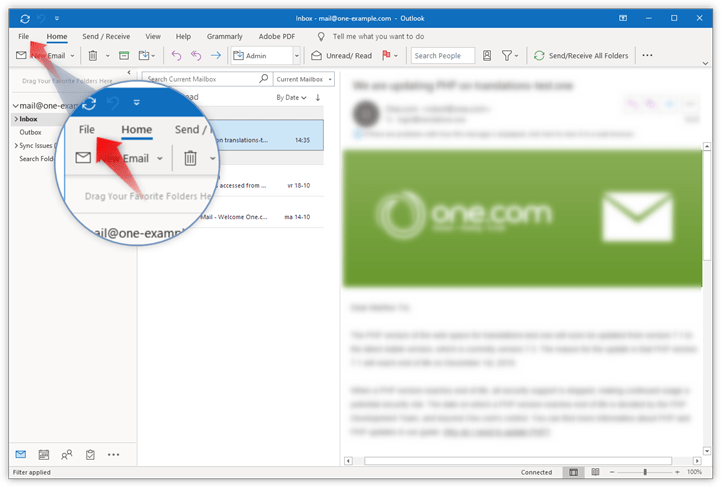
Step 2 – Click Account Settings > Server Settings
- Select the email you want to check the settings for in the drop-down bar at the top of the screen.
- Click Account Settings.
- Click Server Settings in the drop-down menu that appears.

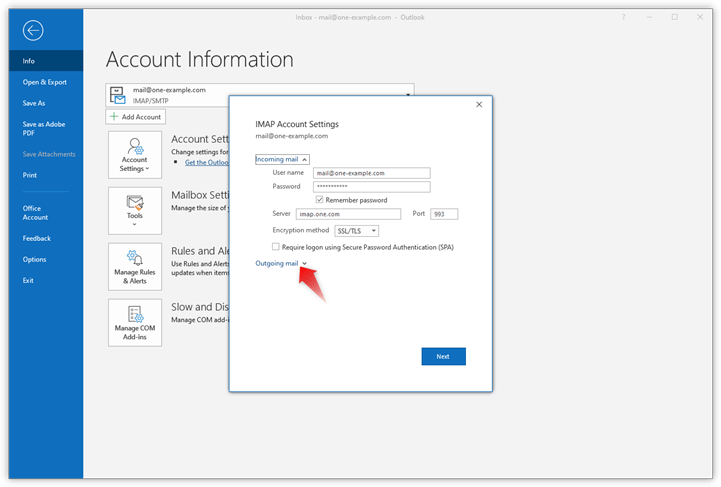
Step 3 – Check the incoming mail settings
The incoming mail settings should be as follows:
- User name: your complete email address
- Password: the one you use to log in to Webmail
- Server: Will be provided to you by New Perspective Design- Mail.yourdomain.co.za
- Port: 993
- Encryption: SSL/TLS
- Secure Password Authentication (SPA): No
If everything checks out, click Outgoing mail.
Step 4 – Check the outgoing mail settings
The outgoing mail settings should be as follows:
- Server: Mail.yourdomain.co.za
- Port: 465
- Encryption: SSL/TLS
- Secure Password Authentication (SPA): No
- Outgoing server authentication: Yes, with the same settings as the incoming server
If everything checks out, click Next.

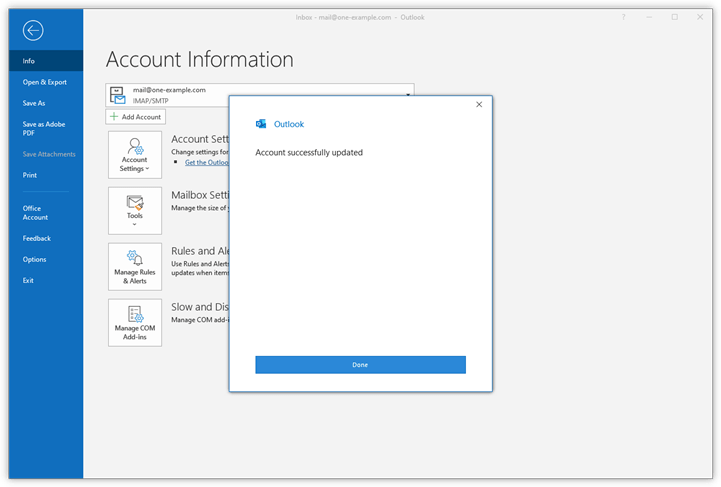
Step 5 – Done!
If you have verified that you are using the correct settings, but your email isn’t working, check this guide: Email setup troubleshooting guide.
That’s it you are all set up to send and receive your company email right from your Outlook simply:
Go to compose or create a new message > A new message tab will open up.
In the new Message tab > Click on From:
This will open a dropdown > Select your domain name email. E.g [email protected]
This email will now send as [email protected] and not your Outlook.
Have an issue contact our support by logging in via your Clientzone Dashboard.